Building Xamarin.Forms Chatbots with Bot Framework Direct Line API
One of the best things about building chat bots with Microsoft Bot Framework is being able to have a single code base for all the channels supported by the Bot Connector, like Slack, Skype, Facebook and even an embedded HTML interface. But what if you want to make your own client? Well, in that case you can use the Bot Framework DirectLine API.

Build a Bot
There are lots of good tutorials on how to get started writing bots using the Microsoft Bot Builder SDK. If you're just getting started, try the excellent Mission Mars Tutorials.
Once you've got the basics, you should try the Bot Boiler Framework in NodeJS. It provides tools for dependency injection, testing, deployment to Azure Functions, and more. I won't go into how to write a good chatbot - this article assumed that your bot code already exists.
Enable Direct Line
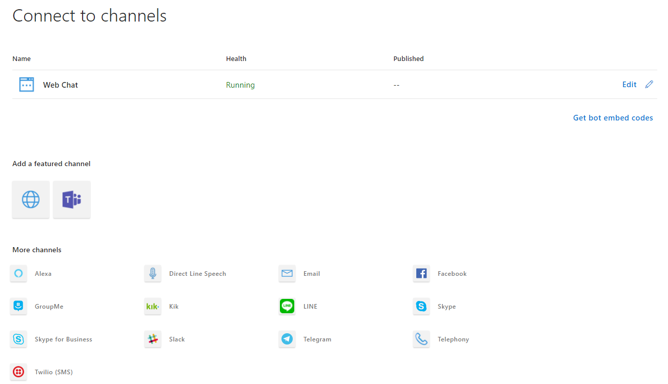
Configure your channels in the Bot Portal and enable the Direct Line channel, then configure your Direct Line Channel, and get your direct line secret. You'll need that secret later on.

Using Xamarin.Forms Project
Why Xamarin and Forms?
If you've never heard of Xamarin, then you've been missing out. Xamarin is a toolset, originally built using the Mono Framework, that allows developers to write common C# (and F#) and deploy applications to many operating systems and environments. The most popular are Android, iOS, and Windows.

Xamarin Forms is a set of API's written in Xamarin that let us write common user interface code. Basically, I can run exactly the same app on Android, iOS and Windows. Cool!
File > New Project (VS2017)
I'm going using Visual Studio 2017. You can download the community version for free. DotNet Standard is supported in VS2015 but not in earlier versions.
This guide can help you create your first Xamarin Forms project. The short version is:
Create a new Xamarin.Forms project
Select PCL as your method for sharing code
Create a blank app (not a master detail page)
Move to dotnet standard
Xamarin.Forms recently started supporting DotNet Standard (hooray!). .Net Standard is the latest and greatest standard for writing cross platform C#. It provides a common set of API's that work everywhere. Better yet, it improves dramatically over the previous standard (Portable Class Libraries, or PCL) as there's no platform targets, just backwards compatible versions of .NET Standard.
Before we get started, we've got to change the way we're sharing code in our Xamarin project, by converting to .NET Standard. We'll change our PCL project (not the Android, iOS, or UWP projects) by deleting packages.config then unloading the project and replacing the contents of the .csproj file with the following code:
<Project Sdk="Microsoft.NET.Sdk">
    <PropertyGroup>
        <TargetFramework>netstandard1.3</TargetFramework>
        <PackageTargetFallback>$(PackageTargetFallback);portable-win+net45+wp8+win81+wpa8</PackageTargetFallback>
    </PropertyGroup>
</Project>
You'll have to re-add and install any NuGet Packages, but at this stage it should only be the Xamarin.Forms package.
Import DirectLine Client
The best thing about targetting .NET Standard is we can use the official NuGet package for interacting with the DirectLine API!
Install-Package Microsoft.Bot.Connector.DirectLine -Version 3.0.2
Communicate with your Bot
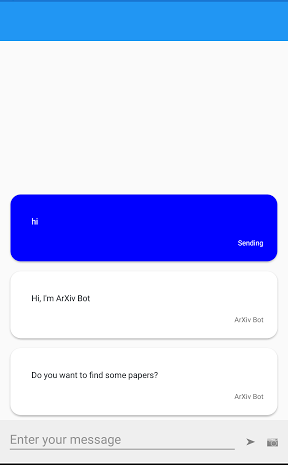
Here's a screenshot of what we expect our Bot UI to look like:

Before continuing, I suggest you read Key Concepts in DirectLine API 3.0
First, we create a microservice class for interacting with the bot. We inject the direct line secret (from the portal) into the constructor.
private DirectLineClient _client;

public BotService(string directLineSecret)
{
    if (string.IsNullOrEmpty(directLineSecret)) {
        throw new ArgumentNullException("Direct Line Secret is required");
    }

    _client = new DirectLineClient(directLineSecret);
}
There are two important public methods: CreateConversation and SendMessage.
public async Task<string> StartConversation(bool isDefault = true)
{
    var conversation = await _client.Conversations.StartConversationAsync();

    PollForMessages(conversation);
    if(isDefault || _defaultConversation == null)
    {
        _defaultConversation = conversation;
    }

    return conversation.ConversationId;
}


// Poll the API every second to check for new messages

private void PollForMessages(Conversation conversation)
{
    Device.StartTimer(new TimeSpan(0, 0, 1), () =>
    {
        var activitySet = _client.Conversations.GetActivities( conversation.ConversationId, _watermark);
        var activities = activitySet?.Activities.Where(_ => _.From.Id != GetUserId());
        _watermark = activitySet.Watermark; // watermark lets us only get new messages

        if (activities != null)
        {
            foreach (var activity in activities)
            {
                ActivityReceived?.Invoke(this, new ActivityEventArgs() { Activity = activity });
            }

        }

        return true;
    });
}
public async Task<ResourceResponse> SendMessage( string message, string conversationId = null)
{
    if (conversationId == null)
    {
        conversationId = GetDefaultConversationId(); // get default if not specified
    }

// create a new Activity to send to the Bot

    SentActivity = new Activity
    {
        From = GetChannelAccount(),
        Text = message,
        Type = ActivityTypes.Message

    };

    // invoke an event signalling an activity has been sent
    ActivitySent?.Invoke(this, new ActivityEventArgs() { Activity = SentActivity });

    var response = await _client.Conversations.PostActivityAsync(conversationId, SentActivity);
    return response;
}
Monitor the Conversation
We need to make a user interface for chatting with the bot. We add these two events to our BotService class in order to track when things happen.
public event EventHandler<ActivityEventArgs> ActivitySent;
public event EventHandler<ActivityEventArgs> ActivityReceived;
These two events are going to let us update our UI any time we send or receive a message from the Bot. We add every activity we send/ receive to an observable collection that we bind to a ListView. Actually, we're going to use a custom UI element, described below, but it inherits from the standard Xamarin Forms ListView.
The ConversationViewModel class contains the following property:
public ObservableCollection<Activity> Messages { get; set; }
and in our XAML view, we create a listview that binds to that collection.
<ListView x:Name="ChatListView"

    ItemsSource="{Binding Messages}"
    ItemTemplate="{StaticResource activityDataTemplateSelector}"
    SeparatorVisibility="None"
    HasUnevenRows="True">

    <customViews:ChatListView.Effects>
        <effects:ListViewScrollToBottomEffect />
        <effects:ListViewStackFromBottomEffect />
   </customViews:ChatListView.Effects>

</ListView>
There are two interesting parts of this XAML:
ItemTemplate="{StaticResource activityDataTemplateSelector}"<customViews:ChatListView.Effects>
Data Templates
We need to tell the difference between messages to and from the bot, and render those messages differently so the user can tell the difference. In order to do that, we use a Data Template Selector, which we referenced in the above XAML.
public class ActivityDataTemplateSelector : DataTemplateSelector
{
    public DataTemplate SenderTemplate { get; set; }
    public DataTemplate ReceiverTemplate { get; set; }
    public DataTemplate AdaptiveCardsTemplate { get; set; }

    protected override DataTemplate OnSelectTemplate(object item, BindableObject container)
    {
       var activity = (Activity)item;

       if (activity.Attachments != null &&
           activity.Attachments.Any(
               m => m.ContentType == "application/vnd.microsoft.card.adaptive"))
           {
               return AdaptiveCardsTemplate;
           }

           if (activity is SendPhotoActivity)
           {
               if (((SendPhotoActivity)activity).Path != null && ((SendPhotoActivity)activity).Path != string.Empty)
               {
                   return SentPhotoAttachmentTemplate;
               }
          }

        return ((Activity)item).From.Name == "MyName" ? SenderTemplate : ReceiverTemplate;
    }
}
Then, in XAML, we bind those three public properties to views which will be rendered at runtime depending on the type of activity. For example, our receiver activity template looks like this:
<DataTemplate x:Key="receiverActivityTemplate">

    <ViewCell>
        <Grid Padding="10, 2, 10, 2">
            <Frame HasShadow="True"
                   VerticalOptions="FillAndExpand"
                   HorizontalOptions="FillAndExpand"
                   Margin="5"
                   CornerRadius="15">

                 <StackLayout
                      Orientation="Vertical"
                      VerticalOptions="FillAndExpand"
                      HorizontalOptions="FillAndExpand">
                      <md:MarkdownView Markdown="{Binding Text}" />
                      <Label Text="{Binding From.Name}"
                          FontSize="Micro"
                          HorizontalOptions="EndAndExpand" />
                </StackLayout>
            </Frame>
        </Grid>
    </ViewCell>
</DataTemplate>
Which we bind to the selector as follows:
<dataTemplates:ActivityDataTemplateSelector
    x:Key="activityDataTemplateSelector"
    ReceiverTemplate="{StaticResource receiverActivityTemplate}" />
Using Effects
Effects are a great way to add platform specific features to your Xamarin Forms UI. Jim Bennet has a really great (and short!) blog post on how to implement Effects in Xamarin Forms.
One effect you might find useful is listing messages from the bottom.
In Android, we need to access the native listview control. With effects, it's easy!
public class DroidListViewStackFromBottomEffect : PlatformEffect
{
    protected override void OnAttached()
    {
        var listView = Control as Android.Widget.ListView;

        if (listView != null)
        {
            listView.StackFromBottom = true;
        }
    }

    protected override void OnDetached(){}

}
Check out the GitHub repo to see all three effects we implemented: Stacking from bottom, auto scrolling, and a keyboard 'done' button.
Using Custom Renderers
Another cool feature of Xamarin Forms are custom renderers. Every UI Container in Xamarin Forms renders to a platform specific UI Control. For example, a Xamarin Forms ListView when running in Android, is actually rendered to a native Android ListView. By writing a custom renderer, we can control the way our UI is converted to native controls.
Working with Adaptive Cards
We're going to use a custom renderer to render adaptive cards received in a conversation. Adaptive Cards are a great way to serialize a display and share it across multiple user experiences. The same adaptive card may be rendered on Facebook Messenger or Microsoft Teams, and though it contains the same information and functionality, the platform renders it to look though it's a native implementation (because it is).
Download and Build the Adaptive Card Renderer for Xamarin Forms
Adaptive Cards by Microsoft is a 100% open source project. Check them out on GitHub.
Adaptive Cards are designed to render anywhere that your users are. The following native platform renderers are under development right now.
Android -> Source
HTML -> Source
iOS -> Source
WPF -> Source
UWP -> Source
Xamarin.Forms -> No ETA yet - Source- Alpha
At time of writing, the Xamarin Forms Renderer is still in alpha - which means we've included a pre-built library in the /lib directory of our project.
Rendering Adaptive Cards
We implemented a custom renderer & data template combination that allowed us to render adaptive cards directly in the ListView.
There are three important parts to rendering the card.
First we need to select the correct Data Template based on the incoming activity. These lines in ActivityDataTemplateSelector achieve just that
if (activity.Attachments != null &&
    activity.Attachments.Any(m => m.ContentType ==
    "application/vnd.microsoft.card.adaptive"))

{
    return AdaptiveCardsTemplate;
}
Second, we create a custom view inheriting from StackLayout
public class AdaptiveCardLayout : StackLayout
{
    public event EventHandler OnAction;
    public void InvokeOnAction(object sender, ActionEventArgs args)
    {
        Device.BeginInvokeOnMainThread(() =>
        {
            MessagingCenter.Send(this, "AdaptiveCardAction",
        }
    }
}
This custom view is bound, via a data template definition in XAML.
<DataTemplate x:Key="adaptiveCardsTemplate">
    <ViewCell>
        <customViews:AdaptiveCardLayout />
    </ViewCell>
</DataTemplate>

...

<dataTemplates:ActivityDataTemplateSelector x:Key="activityDataTemplateSelector"

    AdaptiveCardsTemplate="{StaticResource adaptiveCardsTemplate}"
Thirdly, we use the adaptive cards renderer to actually render the card.
// this code is shortened for brevity, and should not be used.

public class DroidAdaptiveCardLayoutRenderer : ViewRenderer<AdaptiveCardLayout, Android.Views.View>
{
    protected override void OnElementChanged(ElementChangedEventArgs<AdaptiveCardLayout> e)
    {
        var activity = e.NewElement.BindingContext as Bot.Connector.DirectLine.Activity;
        var renderer = new AdaptiveCards.Rendering.AdaptiveCardRenderer();
        var cardAttachments = activity.Attachments.Where(
          m => m.ContentType == "application/vnd.microsoft.card.adaptive");

        var jObject = (JObject)attachment.Content;

        var xaml = renderer.RenderCard(card);

        e.NewElement.Children.Add(xaml.View);
    }
}
You can see our droid renderer on GitHub.
Sample Project
We used these patterns and code in a 3 day hack with the Australian tax office. Hey look, its a robot that helps you with your tax!

You can see the complete solution on GitHub
Further Reading


